Sunday, September 4, 2011

Amazing and simple Brazilian Cheese Bread

Another Recipe of the week...Brazilian Cheese Bread.

I love Brazilian food, but especially the cheese bread.  The only problem is that it is difficult to make and to find the proper ingredients...Until now. This recipe was shown to me by an amazing cook, good friend and fellow UHSC employee Maren Day .

The best part is; the only ingredient that I didn't have at home was the Tapioca flour, which was simply found at our local maceys. So without further adoo...hailing from the " Our Best Bites " Web site I give you Simple Brazilian cheese rolls.

Of all the foods I fell in love with in Brazil, Pao de Queijo (literally translated to ‘bread of cheese’, how can that not be delicious?) is right up there at the top. And it’s been tormenting my soul for the past 10 years as I’ve tried recipe after recipe trying to duplicate the taste and texture I love. You can buy pre-packaged mixes, but they’re not quite the same as homemade. The problem is that there are several different methods to making these little balls of heaven. A lot of them involve lots of hard to find ingredients, and methods like heating a mixture on the stove, kneading a big messy dough, etc. When I was in Brazil, I learned how to make the most quick and easy version- an ultra fast liquid batter that you just poured into a muffin tin. It’s been driving me crazy that I couldn’t find my recipe or one that was like it. And then a few weeks ago something magical happened. My husband walked in after organizing some junk in the garage and asked me if I wanted a little pink notebook. I knew immediately what it was. It was bursting with little scraps of papers. Scraps of papers with recipe notes on them. I heard the hallelujah chorus. We ate Pao de Queijo about 25 minutes later. And it was heavenly.
If you’ve never had this type of Brazilian cheese bread, it’s tricky to explain. It’s actually not “bread” at all- at least not like we’re used to here in the US. It’s almost more like the texture of a cream puff shell or popover, but with more substance on the inside. The outside is slightly crisp and browned and the inside is airy and chewy. If you’re not familiar with them at all then I want you to be fully informed so you don’t expect an actual yeast bread “roll”. If you do, then you’ll probably think these are super weird and gooey. They’re served at popular Brazilian restaurants, but honestly, while I adore those restaurants, I’ve yet to have a really good Pao de Queijo at any of them. So trust me when I tell you that if you like those (or any of the pre-packaged mixes), you will probably love these homemade ones. And if you know anyone who has ties to Brazil like I do, you are sure to melt their heart with these. Once you see how quick and easy they are you’ll be making them all the time!
The best part is that I have 99% of the ingredients in my house pretty much at all times.
The only semi-strange ingredient in there is Tapioca Flour, and it’s actually easier to find than you might think. It’s a really smooth, soft flour that feels much like cornstarch. It’s made from the ground roots of the cassava plant and it’s gluten free for those of you that care about that :)
A lot of normal grocery stores carry a good selection of Bobs Red Mill products which is the brand I use. Here in Idaho I can always find them at Fred Meyer, near the health food/specialty foods isle. You can also find tapioca flour at Asian markets as it’s used in a lot of Asian cooking, and also at health food stores and places like Whole Foods where you can find a good selection of wheat flour alternatives. Definitely check the gluten free isle of well stocked store. If you live in an area with WINCO grocery stores, people are telling me you can find it in the bulk section (how did not know this?? Thank you readers!) You can’t substitute any other type of flour- the tapioca flour is key, so when you find a good place to buy it, stock up!
Okay, ready for easy? You can prep these in about 60 seconds. Seriously. Put everything but the cheese in the blender and blend until smooth.
Then add in your cheese and pulse the blender one or two times. I like to break it up a bit and mix it in, but not pulverize it. And you can be creative here. I like a mixture of Parmesan and sharp cheddar. It’s important to use cheese that has a stronger flavor because it’s really the only flavor you’re putting in there and if it’s too mild I’ve found the rolls turn out pretty bland. But play around with it and find your perfect mix. You can also add more or less cheese, it’s pretty flexible.
Now just take your blender and pour the batter into little mini-muffin tins. It’s a very thin batter so pour slowly!
I like to sprinkle a little more parmesan on top. Because I like to sprinkle a little parmesan on top of just about everything. I inherited that from my father, who puts parmesan on just about everything he makes. A little sprinkle of kosher salt is also yummy.
Recently I was browsing food blogs and was excited to see a nearly identical recipe on Bewitching Kitchen. She mentioned putting rosemary in there, which at first I thought sounded a little strange. Not because I don’t think it would taste good, but because I’d never had pao de queijo with any type of herb before. I tried it just for kicks and man was it good! You can either sprinkle a little dried or fresh rosemary on top, or blend it right in the batter. Loved that addition.
Then you pop these babies in a hot oven and watch them do their magic. They puff up into perfectly little bubbly golden balls of cheesy goodness. How’s that for a descriptive sentence?
You want to cook them just until they’re set on top and barely golden. If you over cook them, the tops actually look pretty similar, but you can tell by the bottoms. Case in point:
And don’t worry if the tops fall in, that happens sometimes- they still taste the same!
Eating Pao De Queijo warm is a definite must. I’ll just say that right now. As soon as they’re cool enough to handle, bust one open and eat it.
They’ll be a little crispy on the outside and soft, airy, and tender on the inside. Almost a little chewy. Some of them are even kind of hollow. This version is definitely less dense than the kneaded dough variety.
I dare you to just eat one. This recipe is a little dangerous.


Enjoy!!! We all did!

Sunday, August 21, 2011

Cinnamon Roll Pancakes...of Wonder and taste.

Cinnamon Roll Pancakes...of Wonder and taste. (I added the last part)

I made these the other day and they were amazing. This is the original recipe taken from this site. As promised to some, I posted the recipe...the whole family loved them.


If you’ve ever thought you needed a reason to eat pancakes, today is the day: National Pancake Day. Eat a short stack for breakfast, enjoy them for lunch, or make a dinner out a manhole-sized pancake… guilt free… because you’re merely celebrating their existence. How do you like your pancakes? Buttermilk? Sweet Potato? Whole Grain? Fruit topped? Whipped Cream? I don’t usually care for any of that fancy stuff, but I can tell with absolute certainty that over-cooked, crusty pancakes have no place in my world. I like my pancakes fluffy. And sometimes I like slices of banana cooked inside. A good dose of real maple syrup is what I prefer to drizzle on top. But recently I started dreaming about mixing cinnamon rolls and pancakes together… and this is what I came up with- my new favorite pancake: Cinnamon Roll Pancakes.

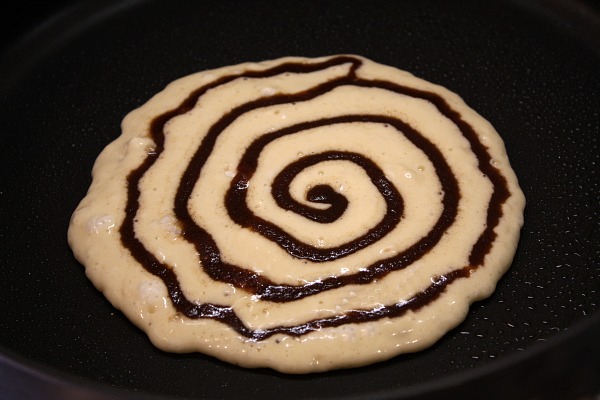
I have a wonderfully fluffy pancake batter that I like to use (recipe below) so I swirled a bit of cinnamon roll filling into the pancake.

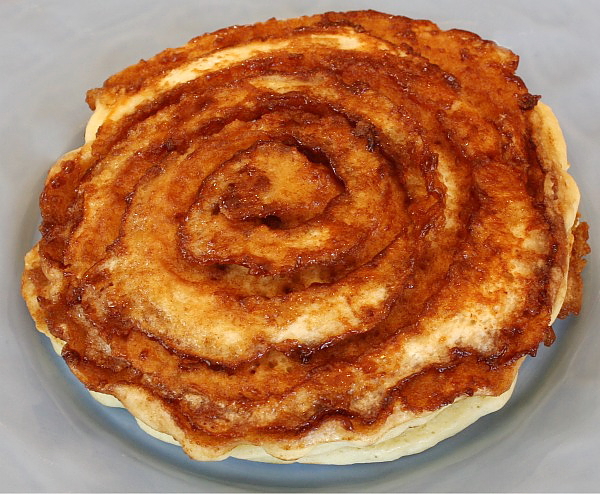
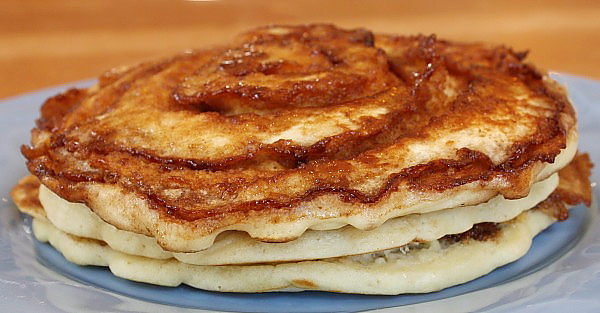
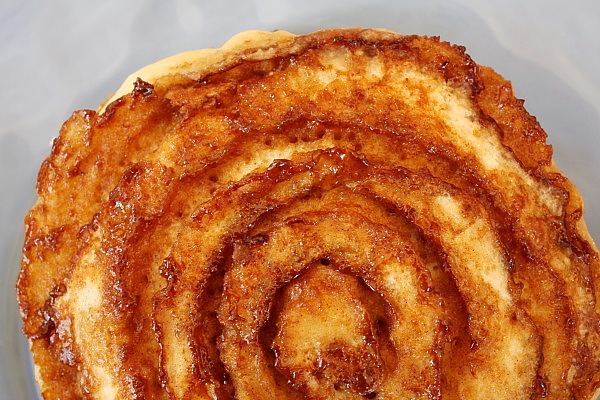
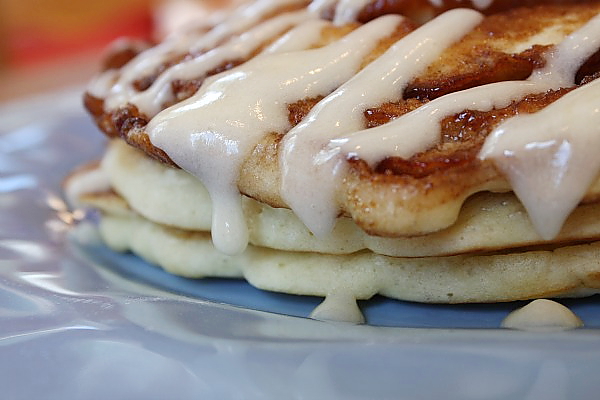
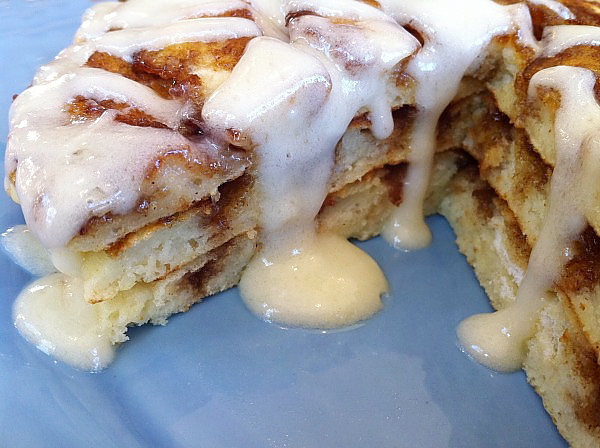
And they cooked up just like a pancake- fluffy, but with craters of crusty, sugary cinnamon swirled within.

You might find three of these stacked in a fancy breakfast restaurant, but I’m gonna tell you that one pancake is all you need. It’s like eating a cinnamon roll, and no one needs more than one cinnamon roll for breakfast. Or certainly no more than two ;)

See, just like a cinnamon roll. Love this. I can eat this pancake just as you see it, but you really need to add the glaze to get the full cinnamon roll-effect. Read on…

Oh yeah. A warmed cream cheese glaze drizzled on top really completes this pancake. No syrup needed. Let me say that again: No. Syrup. Needed.

There you have it: Cinnamon Roll Pancakes. With lots of ooey, gooey cream cheese glaze drizzled on top. Do yourself a favor and treat yourself to a pancake today. Go get ‘em. These babies are just like eating a cinnamon roll, which is a perfectly okay… once in a while, right? I mean, it’s not like I put chocolate chip cookie dough in them or anything. Hmmmm.

Cinnamon Roll Pancakes

Yield: 4 servings (4 pancakes)
Prep Time: 25 min
Cook Time: 10 min
An absolutely decadent morning treat...

Ingredients:

PANCAKES:
1 cup all-purpose flour
2 teaspoons baking powder
1/2 teaspoon salt
1 cup milk
1 Tablespoon canola oil
1 large egg, lightly beaten
CINNAMON FILLING:
1/2 cup butter, melted
3/4 cup brown sugar, packed
1 Tablespoon ground cinnamon
CREAM CHEESE GLAZE:
4 Tablespoons butter
2 ounces cream cheese
3/4 cup powdered sugar
1/2 teaspoon vanilla extract

Directions:

1. Prepare pancake batter: In a medium bowl, whisk together flour, baking powder and salt. Whisk in milk, oil and egg, just until batter is moistened (a few small lumps are fine).
2. In a medium bowl, mix butter, brown sugar and cinnamon. Scoop the filling into a small zip baggie and set aside. You don't want this to remain super-liquidy. It's best if it becomes a consistency similar to toothpaste.
3. In a medium, microwave-safe bowl- heat butter and cream cheese until melted. Whisk together until smooth; whisk in powdered sugar and vanilla extract; set aside.
4. Heat large skillet over medium-low heat. Spray with nonstick spray. Scoop about 3/4 cup batter onto the skillet. Snip the corner of your baggie of filling and squeeze a spiral of the filling onto the top of the pancake. When bubbles begin to appear on the surface, flip carefully with a thin spatula, and cook until browned on the underside, 1 to 2 minutes more. Transfer to a baking sheet or platter and keep in a warm oven until ready to serve.
5. When ready to serve, spoon warmed glaze onto the top of each pancake.

Tips:

*Keep the heat low or your pancakes might cook up too quickly. Don't flip them until you see those bubbles starting to pop on top. Flip them with a wide spatula so you can grasp the whole thing without batter and filling dripping all over the place!
*It's best if you pour the batter onto your skillet, wait a minute or so and then swirl the cinnamon onto the batter. That'll give it a chance to set a little before you add the swirl.
*If your baggie of filling begins to get too thick, just pop it in the microwave for a few seconds to soften it up again. On that same note, it shouldn't be too runny. The consistency of soft toothpaste is perfect. If it's melty and runny, it will tend to run all over your pancakes. Once you micro it, let it sit on the counter at room temp for a while until it thickens slightly.
Source: RecipeGirl.com

Sunday, October 3, 2010

Conference Breakfast


My kids love this, it makes a ton. It fed nine people all day, plus the small pie bowl went to the neighbors. We only have it conference Sundays, twice a year. More than that and the calories might kill you.

3 Bags Potatoes O'brien
4 Pounds Costco Bacon
3 Pounds Costco Sausage
3 loaves white bread (not the heels)
42 Eggs
5 Pounds cheese

I use three bowl to mix all this. Pre-cook the sausage and Bacon. Pre-heat the oven to 350 degrees.

While the bacon and sausage is cooking, put one bag of potatoes in each bowl. 5 pieces of Bread, broken up, about 2 cups shredded cheese plus a handful (?) and one dozen eggs. Mix it all together. Add the Bacon and sausage, divided out evenly.

Place in dishes and cook for about 45-50 minutes (with two pans in the oven). I usually cook it until it is firm to cut with a knife.With a few minutes left put more cheese on the top.

This is one of the best things my kids look forward too, well that and the candy.

blogger templates | Make Money Online